
The first time you put on skis.
Once your instructor has shown you how to carry your skis they will take you to the most suitable area for your beginners skiing lesson.
All ski resorts have specially designed areas for beginners which are flat or very slightly angled with plenty of room to make mistakes. These areas are often called nursery slopes and most of the time are situated at the bottom of the mountain or even in the resort itself.
If you are in a larger group the instructor will normally ask you to line up and place your skis facing in the same direction, next to each other, about half a meter apart. The instructor will insure that the ski tips (the front of the skis) are pointing towards him or her.
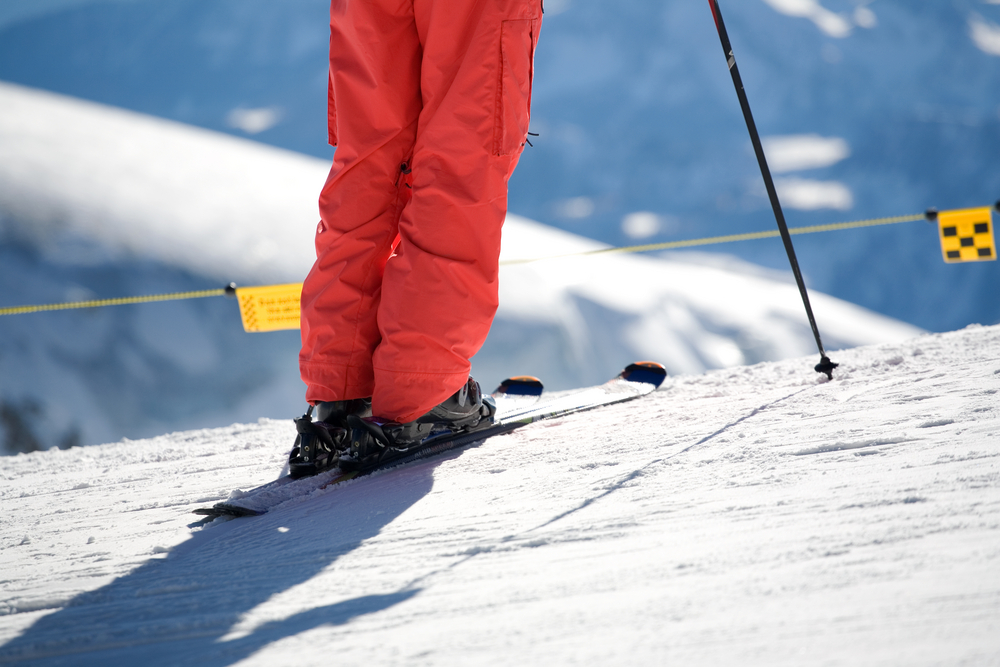
Skis have especially fitting ski bindings on the top of them that are designed to hold your ski boot onto them.
The ski bindings also have small ‘ski brakes’ which stop the skis from sliding away when you are not attached to them.
These brakes do not work to stop you when you are skiing, but if in the event of a fall, the ski bindings are designed to release and the brakes will stop the skis from sliding down the mountain without you.
The ski bindings are in two parts, the front and the back.
The front of the binding is designed to hold the front of the ski boot to the ski and is the part that releases, by twisting sideways, if you fall.
The rear of the binding clamps the back of the ski boot down and holds the whole thing in place.
Putting your skis on is a fairly simple procedure:
They must be put on one at a time.
Always make sure that your other boot is quite close to the ski. If your stance is too wide then the angle of your ski boot will not match the binding and it will be harder to put on.
Using your ski poles for balance, one in each hand, you will place the front of one ski boot into the front part of the binding on either your left or right ski.
Then, insure the back of your ski boot is placed over the rear of the ski binding and slowly push down.
If the boot does not force the rear binding to clamp down, push harder and put more pressure on your heel. Leaning slightly back and pushing down can help this.
Repeat this step with your second ski.
Now you are clamped into your skis. The binding are holding you firmly in place and the skis become an extension of your legs. You are ready to start skiing.
Before you do so it’s important to take your skis off at least once so you know how to.
The most common method is to use one of your ski poles:
Place it in the rear part of the binding.
This part of the binding has a specially designed divot that takes the tip of your pole.
Then press down hard on your ski pole whilst pulling up with your heel. You boots should easily release from the ski.
Repeat this step with the second ski.
Lets start skiing….Now read my next post where I discuss what the ski instructor will do in your first ski lesson, once your skis are on.
Any questions?? Please leave a comment…


2 Comments
Annonymous
16 years agoJust had my first ski lesson today, one thing they taught us that might catch someone up if you don’t take ski lessons, is this:
If you come undone from your skis, the ski binding may still be “locked” even though you are disconnected from it. Simply do as you would normally do to unlock it (as mentioned above, you use your ski pole and press down into the divot, you could also use your hands or foot to press down on it too).
Just thought I’d share this, so people reading this don’t get too frustrated if they’re just starting out, and find they’re having problems getting back onto their skis after a wipe out!
Robert Stewart
16 years ago@Annonymous –
This is a good tip. I have seen beginners struggle to get their skis back on after a fall hundreds of times because of the locked binding. It happens because the front part of the binding twists and releases the ski boot to prevent injury, but the back part of the binding stays in the locked position. I would just recommend using your hands to ‘re-set’ the back part of the binding by simply pushing down on it until you hear it clicking. Then you can easily put the skis back on in the normal way.
Comments are closed.